ACNE
SCARS
MEDICAL MICRONEEDLING
A practical approach to facial atrophic acne scars. Match treatment to scar architecture, plan a course of medical microneedling and follow progressive changes in texture, depth and overall appearance.

Three scar types. A treatment plan for each.
Rolling scars
Broad, undulating depressions may reflect fibrous tethering beneath the skin. Assess mobility and distensibility. Medical microneedling can improve the surrounding atrophic texture; consider subcision when tethering needs release. [1,3]
Boxcar scars
Sharply defined depressions vary in depth. Shallow boxcar scars can respond to remodeling or resurfacing. Deep, steep-sided lesions may require focal punch elevation or excision before wider texture treatment. [3]
Ice-pick scars
Narrow, deep tracts often need focal correction such as CROSS or punch excision. Use microneedling to address coexisting atrophic texture, with realistic expectations for the deep tract itself. Mixed scar patterns commonly require a combined plan. [3]
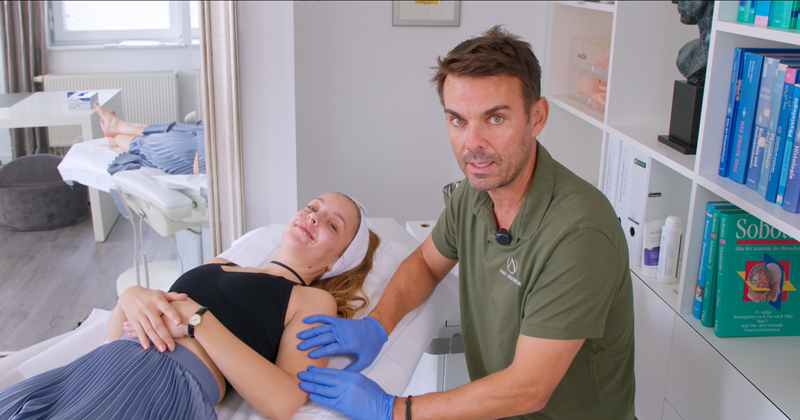
Medical Microneedling for Acne Scars
Needle depth, treatment techniques, tissue response and clinical endpoints.
See the treatment in practice.
Watch PD Dr. med. Matthias Aust demonstrate medical microneedling for facial acne scars, explaining device settings, treatment techniques and how to adapt the procedure to different skin conditions.
How do you select the right needle depth?
Explore how needle depth is adjusted according to scar characteristics, tissue structure and skin response during treatment.
What makes the treatment precise and controlled?
See circular and linear techniques, targeted treatment of affected areas and practical adjustments for the forehead, cheeks and chin.
How do you know when to stop?
Learn how pinpoint bleeding and tissue response guide treatment coverage while avoiding excessive needling and unnecessary skin trauma.
Complete the form to watch the expert video.
A repeatable course, with room for clinical judgment.
Establish readiness before treatment
Control active acne and assess the scar pattern, skin condition and healing history before starting.
Focus this pathway on established facial atrophic scars older than six months. Document rolling, boxcar and ice-pick lesions separately, including their depth, distribution and effect on the patient. Assess pigmentation and erythema independently from loss of tissue. [1,3]
Screen for factors that change the plan
Defer needling through active acne, infection or inflammatory skin disease. Review pregnancy or breastfeeding, bleeding disorders, anticoagulants, impaired healing, uncontrolled diabetes, keloid tendency, immunosuppressive or cancer treatment, anesthetic allergy and recent facial procedures. Check current IFU contraindications and coordinate medication decisions with the prescribing clinician. [1,2]
Medical microneedling for acne scars
Plan a progressive treatment series and allow the skin to recover fully between visits. [1]
A practical initial framework is four sessions spaced approximately four weeks apart: weeks 0, 4, 8 and 12. Reassess healing, pigmentation and tolerance before each visit. Adjust or postpone the next session when the skin has not recovered. [1]
Plan the whole appointment
Allow around 16 minutes for active facial needling as a planning reference, with additional time for assessment, photographs, preparation, anesthesia and aftercare. The treated area and tolerance determine the actual duration; do not use elapsed time as a treatment endpoint. [1]
Select settings for the treatment site
Start conservatively and adjust within the current instructions for the specific EXCEED model. [1,2]
For the facial protocol described here, begin at 0.5 mm needle protrusion and increase incrementally according to local tissue response, with pinpoint bleeding as the procedural endpoint. Maximum protrusion is 1.5 mm with the specified cartridge. A protrusion setting is not a guarantee of exact penetration depth. [1,2]
Adapt by anatomy; document actual settings
Assess skin thickness, scar architecture and sensitivity at each site. Avoid applying one depth indiscriminately across the face. Use only the zones, frequency, technique and endpoints permitted by the current regional IFU and training. Do not transfer deeper settings from other devices or body protocols to this facial pathway. [1,2]
Allow remodeling before judging the result
Compare the same scars under the same conditions, including a later visit after the active course. [1]
Schedule the main outcome assessment approximately three months after the fourth treatment. Use standardized photographs and a consistent scar severity scale, alongside the patient’s assessment of texture and appearance. Record any residual tethering or deep focal defects. [1]
Decide what the residual scar needs
Review depth, edges, surface texture, pigment change and patient priorities separately. Additional needling should follow demonstrated response and recovery. Persistent deep or tethered lesions may need a different modality rather than simply increasing needle depth or repeating the same procedure. Improvement varies, and complete scar removal is not the treatment goal. [1,3]
Medical Microneedling: Clinical Insights, Techniques & Outcomes | PD Dr. Matthias Aust
From acne scars to stretch marks: patient selection, needle depth, treatment endpoints, safety, and realistic clinical expectations.
From clinical expertise to better treatment decisions.
Join PD Dr. med. Matthias Aust for an expert discussion on medical microneedling, combining clinical experience with practical treatment insights.
Why does the treatment mechanism matter?
Discover how mechanical microneedling differs from RF treatments and how controlled microinjury supports skin regeneration.
How do you know when to stop?
Explore needle depth, skin stretching, treatment techniques, and pinpoint bleeding as a clinical endpoint without overtreatment.
What really matters for safe, effective microneedling?
Learn why scientific evidence, device quality, professional training, and realistic patient expectations are essential for clinical success.
Six steps from assessment to aftercare.
01 · Map and photograph
Record scar subtype and baseline severity, then identify repeatable facial landmarks. Keep lighting, camera distance, angle, facial expression and skin tension consistent at follow-up. Obtain consent that covers expected improvement, recovery and risks. [1]
02 · Prepare and anesthetize
Cleanse the area and select an appropriate topical anesthetic after reviewing allergy and contraindications. Allow its labeled application time; approximately 30 minutes is a preparation reference for this pathway. Follow the product’s dose, area and exposure limits. [1]
03 · Prepare the sterile field
Remove residual anesthetic, disinfect the skin and allow it to dry. Fit a new sterile single-use cartridge and the required protective barriers. Use only a compatible glide product permitted by the current device instructions. [1,2]
04 · Control contact and movement
Stretch the treatment area to support even needle entry. Hold the handpiece perpendicular to the skin and use controlled circular movement as taught for the device. Maintain consistent coverage and adapt settings to the tissue response. [1]
05 · Monitor the endpoint
Increase protrusion incrementally within the permitted limit. Monitor for the prescribed pinpoint-bleeding endpoint and tissue tolerance. Remove blood gently with sterile saline to limit crust formation, then cleanse with sterile saline at completion. [1]
06 · Record and review
Document the area, cartridge, protrusion, frequency, treatment time, response and any adverse reaction. Provide written aftercare instructions and a clinic contact route. Confirm recovery before the next session. [1]
Support healing between every visit.
Day 0 · Immediate response
Explain that redness, tenderness, swelling and pinpoint bleeding can occur. Provide an individual aftercare plan and avoid judging scar improvement while swelling is present. [1,4]
Days 1–7 · Skin care
Use gentle cleansing and the products specified by the treating clinician and device instructions. Avoid makeup for at least 24 hours, and longer if the skin has not recovered. Protect the area from sun exposure and avoid irritating products during healing. [4]
Monitor pigment change
Discuss post-inflammatory hyperpigmentation before treatment, especially with a previous history of pigment change. Review new discoloration before scheduling another session. Mechanical needling does not eliminate pigment risk. [1,4]
Know when to contact the clinic
Increasing pain, spreading redness, warmth, discharge, persistent swelling or delayed healing require prompt clinical review. Give the patient clear contact details rather than waiting for the next planned appointment. [4]
Weeks · Progressive remodeling
Assess changes over weeks and months. Follow the same scars and repeat the same photographs. Surface recovery occurs before the full remodeling response can be judged. [1]
Select the right device pathway
Use the current regional labeling and IFU. U.S. EXCEED and EXCEED UNLIMITED acne-scar clearance covers facial scars in adults aged 22 or older with Fitzpatrick I–IV. Confirm the intended purpose for the exact device and market before treatment. [2]
Document visible changes in acne-scar appearance.


Illustrative images. Courtesy of Dr. Zoya Evsyukova, specialist of regenerative medicine, plastic surgeon. Individual results vary.
Compare the same area over time
Use consistent lighting, facial position and camera distance for clinical documentation. Assess lasting changes after recovery rather than interpreting immediate swelling as a final result.


Illustrative images. Courtesy of Dr. Zoya Evsyukova, specialist of regenerative medicine, plastic surgeon. Individual results vary.
Follow contour and surface texture
Assess residual depressions, scar edges and surrounding skin texture together. An image pair illustrates appearance; it does not establish the session count, device settings or expected response for another patient.
Bring evidence into your clinical practice.
Discover EXCEED UNLIMITED and explore professional training, product information and options for your market. Review the evidence alongside the current regional labeling and Instructions for Use.
Clinical references and device information.
[1] Safety and Effectiveness of an Automated Microneedling
Freiherr von Dalwig-Nolda D, Ablon G. Safety and Effectiveness of an Automated Microneedling Device in Improving Acne Scarring. J Clin Aesthet Dermatol. 2020;13(8):17–22. Open publication.
[2] EXCEED device information
U.S. Food and Drug Administration. EXCEED Microneedling Device: 510(k) K182407, indications for use and device summary. Open FDA document. Always consult the current regional IFU for the device in use.
[3] Scar classification and treatment options
Connolly D, Vu HL, Mariwalla K, Saedi N. Acne Scarring—Pathogenesis, Evaluation, and Treatment Options. J Clin Aesthet Dermatol. 2017;10(9):12–23. Open reference.
[4] Recovery and patient information
American Academy of Dermatology. Microneedling can fade scars, uneven skin tone, and more. Open guidance.